Add documents to a Project
Upload files into a Project Context panel so you can work with them there.
Add documents to a Project so the Project Assistant can work with them.
Upload documents
Open your Project
In the sidebar, select Projects, then open the Project you want.
Open the upload menu
In the Context panel, select Upload documents. Choose Upload from computer. If your organisation has connected tools, you may also see import options such as Google Drive.
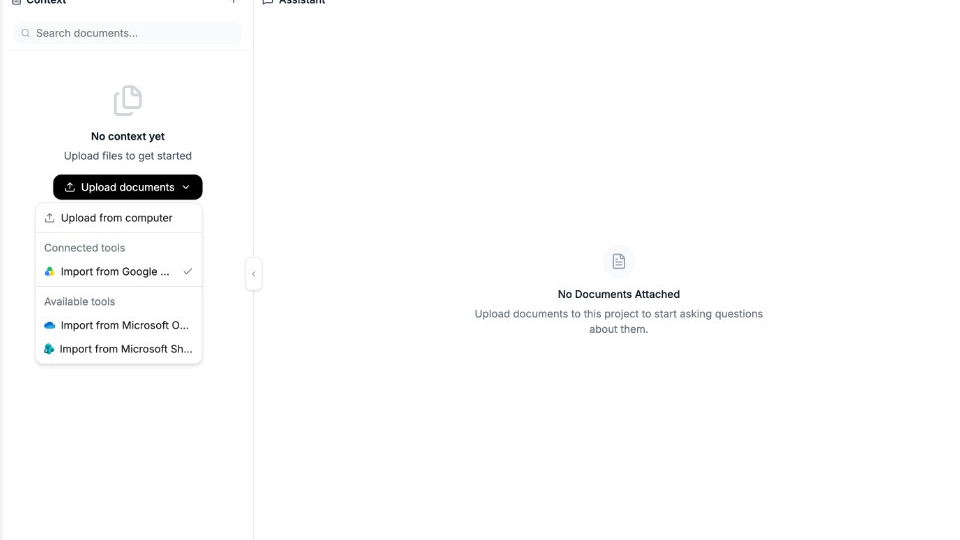
Upload from your computer, or import from a connected tool when available. Wait while files are processed
After you choose files, Context may show Reading… while each document is processed. The Assistant may also show that search accuracy may be limited until processing finishes.
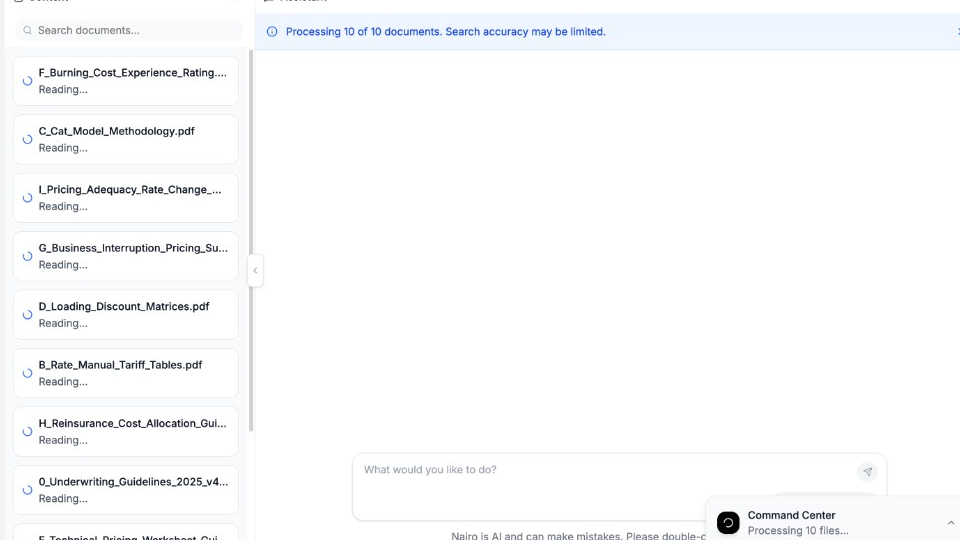
Wait for processing to finish before you rely on search accuracy. Confirm documents appear in Context
When processing is done, your files appear in the Context list and are ready to use.
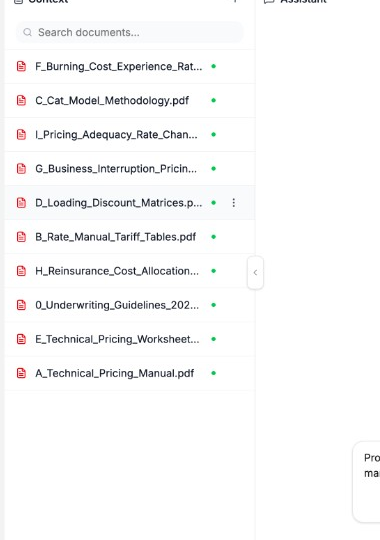
Uploaded files appear in the Project Context list.
Need more help?
If you are stuck, email support@nairobilabs.com.